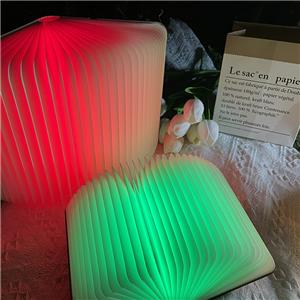
Wooden lamp making process

The Art of Wooden Lamp Making: A Detailed Guide to Craftsmanship
Wooden lamps combine functionality with artistic expression, offering a timeless addition to any space. The process of crafting a wooden lamp requires precision, creativity, and an understanding of woodworking techniques. This guide explores the detailed steps involved in creating a high-quality wooden lamp, from material selection to final assembly. For those interested in the broader context of traditional crafts and their relation to material and spiritual life, our dedicated article offers deeper insights.
1. Selecting the Right Wood
The foundation of a durable wooden lamp lies in choosing the appropriate wood type. Hardwoods such as oak, walnut, and maple are preferred for their strength and fine grain. Softwoods like pine may be used for lighter designs but require additional treatment for stability. Each wood type offers distinct textures and finishes, influencing the lamp’s final appearance.
2. Designing the Lamp Structure
Before cutting the wood, a detailed design plan is essential. Considerations include:
Lamp Shape: Cylindrical, rectangular, or abstract designs.
Dimensions: Height, width, and base stability.
Electrical Components: Space for wiring, bulb fittings, and switches.
Technical sketches or digital models help visualize the final product and minimize errors during construction. Understanding the role of 3D modeling in custom wooden designs can significantly enhance this phase.
3. Cutting and Shaping the Wood
Using specialized tools, the wood is cut into precise components:
Base: Provides stability; often thicker and weighted.
Body: The central structure, which may feature carvings or grooves.
Shade Frame: If incorporating a wooden shade, delicate cuts are required.
Tools such as lathes, bandsaws, and chisels ensure smooth edges and accurate dimensions.
4. Sanding and Surface Preparation
Sanding is crucial for a polished finish. The process involves:
Coarse Sanding (80-120 grit): Removes rough edges.
Medium Sanding (150-220 grit): Smoothes the surface.
Fine Sanding (300+ grit): Prepares for staining or sealing.
Dust removal between stages ensures an even texture.
5. Assembling the Lamp Components
The wooden pieces are carefully assembled using adhesives, dowels, or screws. Key steps include:
Securing the Base: Ensures the lamp remains upright.
Attaching the Body: Aligns with the base for structural integrity.
Installing Electrical Parts: Wiring is threaded through pre-drilled channels, connecting the socket, switch, and plug.
6. Applying Finishes for Protection and Aesthetics
A high-quality finish enhances durability and visual appeal. Options include:
Oil Finishes: Highlight natural wood grains.
Lacquer or Varnish: Provides a glossy, protective layer.
Wax Coatings: Offers a matte, smooth texture.
Multiple thin coats are applied, with light sanding between layers.
7. Final Quality Checks
Before completion, the lamp undergoes testing:
Stability Test: Ensures the base supports the structure.
Electrical Safety: Verifies proper wiring and insulation.
Aesthetic Review: Checks for consistent coloring and smoothness.
Conclusion
The wooden lamp making process blends technical skill with artistic vision. Each step—from wood selection to final finishing—contributes to a functional and visually striking piece. By mastering these techniques, craftsmen can produce lamps that serve as both lighting solutions and decorative art. For more insights into woodworking and handmade lighting, explore our collection at Gumowoodcrafts or learn about advanced CNC carving techniques that revolutionize modern woodcraft production.

